My friend Rémi found an Emacs package developed by Tecosaur to take screenshots of your code. I usually do it with scrot, but it always requires spending some time cropping the result with Gimp. A bit annoying.
Installation
Let us give it a try. The screenshot package is not available on
MELPA due to cosmetic
issues, so we have two options.
The first one would be to clone the
repository, add its location to
load-path, and use require to load the module. But doing so means having
to explicitely install its dependencies, transient and posframe.
The second option is to rely on
use-package and
straight.el. With
straight.el, you can load packages from various sources, including Git
repositories.
(use-package screenshot
  :straight (:type git :host github :repo "tecosaur/screenshot"))
Evaluate the form with C-x C-e, and straight.el will clone the repository
and load the screenshot package.
Usage
Simply run M-x screenshot to take a screenshot. If you are currently
selecting a region, it will screenshot this part only. If not, it will use the
entire buffer.
Since Screenshot uses the
transient library, it has the same well designed interface system as
Magit:
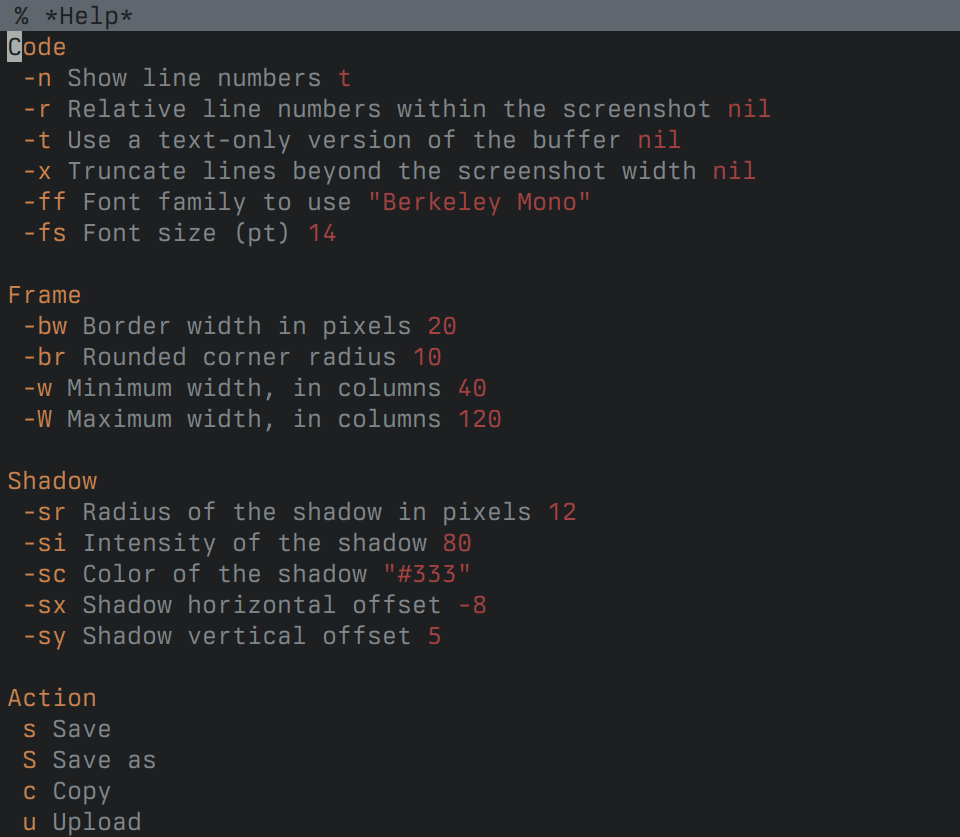
I really like the ability to adjust the font size just for the screenshot. By
default, the save action will save the image in the same directory as the
buffer which was selected when screenshot was executed.
Customization
Screenshot lets you change the default value of each setting. This is not
obvious when reading the code, because the variables used are defined
programmatically through two layers of macros: first
screenshot--define-infix then transient-define-infix.
It is too bad these values are not defined as proper settings using
defcustom, but we can still set them.
This is a list of available settings:
| Variable | Description |
|---|---|
screenshot-line-numbers-p |
Whether to display line numbers or not. |
screenshot-relative-line-numbers-p |
Whether to use relative line numbers or not. |
screenshot-text-only-p |
Whether to show code as simple text or not. |
screenshot-truncate-lines-p |
Whether to truncate long lines instead of wrapping them. |
screenshot-font-family |
The name of the font to use. |
screenshot-font-size |
The size of the font to use. |
screenshot-border-width |
The width of the border. |
screenshot-radius |
The corner radius of the border. |
screenshot-min-width |
The minimal width of the screenshot as a number of characters. |
screenshot-max-width |
The maximal width of the screenshot as a number of characters. |
screenshot-shadow-radius |
The corner radius of the shadow. |
screenshot-shadow-intensity |
The intensity of the shadow. |
screenshot-shadow-color |
The hexadecimal code of the shadow. |
screenshot-shadow-offset-horizontal |
The horizontal offset of the shadow in pixels. |
screenshot-shadow-offset-vertical |
The vertical offset of the shadow in pixels. |
Another nice feature is the presence of a hook executed in the temporary buffer used for the screenshot, allowing to execute code affecting this buffer just before the actual screenshot is being taken.
In my case, I use it to disable the fill column indicator and to remove the additional line spacing added by default by Screenshot.
This is my configuration:
(defun g-screenshot-on-buffer-creation ()
  (setq display-fill-column-indicator-column nil)
  (setq line-spacing nil))

(use-package screenshot
  :straight (:type git :host github :repo "tecosaur/screenshot")

  :config
  (setq screenshot-line-numbers-p nil)

  (setq screenshot-min-width 80)
  (setq screenshot-max-width 80)
  (setq screenshot-truncate-lines-p nil)

  (setq screenshot-text-only-p nil)

  (setq screenshot-font-family "Berkeley Mono")
  (setq screenshot-font-size 10)

  (setq screenshot-border-width 16)
  (setq screenshot-radius 0)

  (setq screenshot-shadow-radius 0)
  (setq screenshot-shadow-offset-horizontal 0)
  (setq screenshot-shadow-offset-vertical 0)

  :hook
  ((screenshot-buffer-creation-hook . g-screenshot-on-buffer-creation)))
All in all a very useful package!